Building a paver patio doesn’t require emptying the savings account or hiring a high-end landscape contractor. With smart material choices, DIY-friendly techniques, and strategic design decisions, homeowners can create durable, attractive outdoor living spaces for a fraction of typical installation costs. The key is knowing where to spend and where to save. This guide walks through practical, field-tested strategies for building a paver patio that looks professional without the professional price tag, from selecting cost-effective materials to mastering installation shortcuts that won’t compromise structural integrity.
Table of Contents
ToggleKey Takeaways
- A budget-friendly paver patio costs $3–$6 per square foot when DIY-installed with concrete pavers, compared to $8–$12 for stamped concrete or $15–$25 for flagstone, making pavers the most economical hardscape option.
- Plan your paver patio layout to minimize cuts by designing around standard paver dimensions and aiming for full pavers to fill 80–90% of the area, reducing both labor time and material waste.
- Proper base preparation with 4–6 inches of compacted crushed stone and 1 inch of bedding sand is essential and non-negotiable, even on a budget, to prevent settling, frost heave, and paver failure.
- Shop for utility-grade or seconds pavers with minor imperfections for 30–50% discounts; once installed with polymeric sand, these cost-saving units look indistinguishable from premium pavers.
- DIY installation techniques like renting affordable equipment ($60–$80 per day for compaction), using a diamond blade angle grinder for cuts, and enlisting a neighbor’s help can reduce total project costs by 40–60% versus contractor pricing.
- Create a high-end appearance with budget paver ideas like mixing paver sizes, adding a soldier course border, incorporating solar path lighting, and planting low-cost groundcovers without compromising the overall design vision.
Why Pavers Are the Perfect Budget-Friendly Patio Solution
Pavers offer several financial advantages over poured concrete or natural stone patios. They ship in manageable sizes, eliminating the need for concrete trucks, pump rentals, or heavy equipment. Most pavers can be transported in a standard pickup truck or delivered in small batches.
The per-square-foot cost for basic concrete pavers ranges from $3–$6 installed (DIY), compared to $8–$12 for stamped concrete or $15–$25 for flagstone. Material waste stays minimal since pavers cut cleanly with a diamond blade and broken units can fill edges or be returned.
Pavers forgive minor ground settling better than monolithic slabs. Individual units shift independently, reducing cracking. If one paver stains or cracks years later, it’s replaceable without tearing out the entire surface, a repair that costs under $5 versus hundreds for concrete patching that never quite matches.
Installation requires no specialized training beyond basic carpentry and landscaping skills. There’s no 72-hour cure time, no forms to build, and no need to schedule around weather as tightly as with poured concrete.
Smart Planning Strategies to Minimize Paver Patio Costs
Start by measuring carefully. A 12×12-foot patio (144 square feet) is the functional minimum for a small table and chairs. Expanding to 16×16 feet (256 square feet) adds 112 square feet but keeps the space usable for furniture arrangements without feeling cramped.
Design to the paver dimensions rather than cutting to fit a random shape. Standard concrete pavers come in 12×12-inch, 6×9-inch, and 4×8-inch sizes. Plan the layout so full pavers fill 80–90% of the area, minimizing cuts. Every cut requires time, a wet saw or angle grinder rental ($40–$60 per day), and increases material waste.
Timing purchases around seasonal sales makes a measurable difference. Many home centers discount pavers 20–30% in late fall and early spring when demand drops. Buying pallet-quantity materials in advance allows homeowners to lock in prices and stage the project across several weekends without rushing.
Skip complex curves and diagonal patterns on a first paver project. A straight running bond or herringbone pattern looks sharp, installs faster, and wastes less material than circular designs that require dozens of angled cuts. Save intricate layouts for future upgrades when skills and budgets allow.
Consider a two-phase installation. Build the main patio surface this season, then add borders, lighting, or an expanded seating area next year. Spreading costs across tax years or pay periods reduces financial pressure.
Budget-Friendly Paver Material Options
Concrete pavers remain the most economical choice. Basic gray units cost $1.50–$2.50 per square foot. Upgrading to tumbled or color-blended pavers adds $0.50–$1.00 per square foot but delivers a higher-end look without breaking budget thresholds.
Reclaimed brick offers character at low cost if sourced locally. Check salvage yards, Craigslist, or demolition sites for used brick at $0.25–$0.75 per unit. Expect size inconsistencies and plan for extra cutting. Old brick often contains mortar residue, wire-brushing cleans them up for a rustic appearance that hides imperfections.
Permeable pavers cost slightly more upfront ($3–$5 per square foot) but eliminate the need for separate drainage systems in many jurisdictions. The gaps between units allow water infiltration, which can reduce or eliminate stormwater permit requirements and save on grading work.
Avoid thin porcelain pavers for budget projects. They’re beautiful but fragile, requiring perfect base prep and costing $8–$15 per square foot. Save those for small accent areas if at all.
Shop the “seconds” or “utility grade” bins at paver suppliers. These units have minor color variations or small chips that don’t affect function. Discounts run 30–50%, and once installed with polymeric sand, the imperfections disappear into the overall pattern.
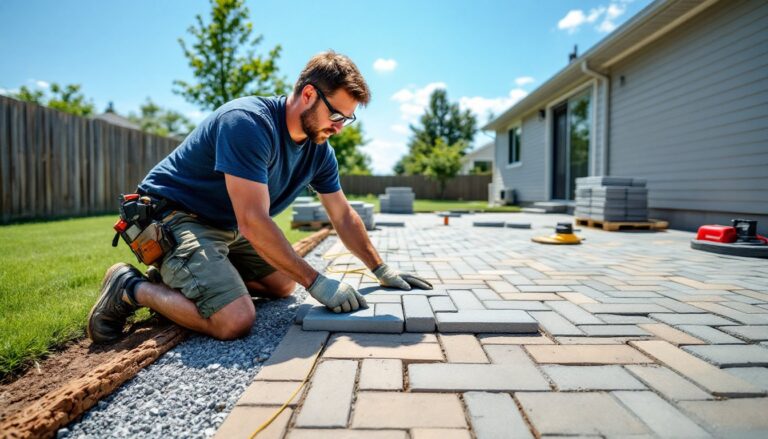
DIY Installation Techniques That Save Money
Proper base preparation is non-negotiable, but it doesn’t require expensive materials. A standard base consists of 4–6 inches of compacted crushed stone (¾-inch minus) topped with 1 inch of bedding sand. Skipping the stone base invites settling and frost heave in northern climates.
Rent a plate compactor ($60–$80 per day) instead of hand-tamping. The investment pays back in speed and proper compaction. Make two passes in perpendicular directions, compacting in 2-inch lifts. Inadequate compaction causes more paver failures than any other mistake.
Use string lines and a 4-foot level to maintain consistent slope for drainage, a minimum ⅛ inch per foot away from structures. This prevents pooling without requiring laser levels or transit equipment.
Polymeric sand for joints costs $40–$60 per 50-pound bag (covers roughly 100 square feet) but eliminates weed growth and ant colonies better than regular sand. Sweep it into joints dry, mist lightly, and let it cure. It’s worth the upgrade over standard mason sand.
Cut pavers with a 7-inch diamond blade in an angle grinder ($8–$12 per blade). A wet saw produces cleaner cuts but costs $75–$100 to rent for a day. For 20 or fewer cuts, the angle grinder works fine, wear safety glasses, a dust mask, and ear protection.
Ask a neighbor to help with the screeding and laying phases. Two people can install 150–200 square feet in a weekend. Solo work takes twice as long and increases back strain from repetitive bending.
Creative Design Ideas That Look Expensive but Aren’t
Mixing paver sizes creates visual interest without adding cost. Combine 12×12-inch and 6×6-inch pavers in an alternating pattern, or run a border of smaller pavers around a field of larger units. The material cost stays flat, but the design reads as custom.
A soldier course border, pavers turned perpendicular to the field, adds definition and a finished edge for the cost of 10–15% more pavers. It frames the space and covers minor cutting inconsistencies at the perimeter.
Incorporate inexpensive decorative elements like integrated landscape lighting that highlights the patio edges at night. Solar-powered path lights ($5–$10 each) require no wiring and transform the space after dark.
Leave intentional gaps every 4–6 feet and plant low-growing groundcovers like creeping thyme or sedum. The green pockets soften the hardscape and cost under $3 per plant. They’re drought-tolerant once established and release fragrance when stepped on.
Staining or sealing pavers after installation enhances color depth and costs $0.30–$0.60 per square foot for materials. A pump sprayer and roller make application straightforward. Sealers also inhibit staining from leaves, barbecue drips, and UV fading.
Build in simple planter boxes at the patio corners using the same pavers dry-stacked without mortar. Fill them with seasonal flowers or herbs. The vertical elements add dimension and cost only the additional pavers (roughly $20–$40 per box).
Money-Saving Tips for Edging, Base Prep, and Finishing Touches
Plastic paver edging ($1–$2 per linear foot) holds perimeter pavers in place and prevents lateral shifting. It’s hidden once installed and far cheaper than concrete or metal edging. Spike it every 12 inches into compacted base material.
Source base stone locally to avoid delivery fees. A cubic yard of crushed stone (covers roughly 80 square feet at 4 inches deep) costs $35–$50 at a quarry but $80–$120 delivered in small quantities. Rent a pickup truck or trailer for $30 and make two trips.
Use landscape fabric under the stone base only if the native soil is clay-heavy or prone to mixing with the stone. In sandy or well-draining soils, it’s unnecessary and adds $0.15–$0.25 per square foot. Don’t place fabric directly under the sand layer, it prevents proper interlocking.
Borrow or rent a sod cutter ($70–$90 per day) if removing grass over large areas. It strips turf cleanly in 12-inch-wide strips, much faster than a shovel and back-friendlier. The cut sod can be composted or used to patch bare spots elsewhere in the yard.
Sweep and compact the patio surface with the plate compactor after pavers are laid but before adding polymeric sand. This seats the pavers into the bedding layer and reveals any high or low spots while they’re still easy to adjust.
For a polished outdoor living setup without new furniture costs, repurpose indoor pieces that can handle weather. A coat of exterior paint and weatherproof cushions transform old chairs and tables into patio seating for under $100.
Conclusion
A budget-friendly paver patio doesn’t mean sacrificing quality or appearance, it means making informed decisions about materials, timing, and labor. By handling the installation personally, shopping strategically, and focusing effort on proper base preparation rather than expensive finishes, homeowners can build outdoor spaces that deliver years of use at a fraction of contractor pricing. Start small, use the techniques above, and expand as time and budgets allow.